Published
✅✅ MUST HAVE Lenses For the Canon SL2/200D:
✅✅ Canon SL2:
✅✅ Canon 200D:
Canon SL2 Tutorial For Beginners - Canon 200D User Manual Guide Tutorial
So now we’ve learnt the very basics of getting your Canon SL2 set up, let’s now take a look at some of the physical features.So to turn your camera on, its as simple as you’d expect. All you need to do is flick the with on the top here to the on side. You should hear the camera turning on and the rear LCD will also come on.
Tour of the buttons on the Canon 200D.
Let’s now take a look at some of the buttons that you’ll find on your Canon SL2. Starting at the very front of the camera, we have probably what is the most important button and that’s the shutter button, or the button that you’ll use to physically take a photo.
This button here has two ways to use it, you can press it fully down or you can half press it, which will allow you to focus.
Let’s try this out. So like I said before, one you’re looking through your viewfinder, you can frame up your subject and if it’s not in focus, lightly press down on the shutter button.
From here you’ll probably hear your camera autofocusing or more specifically your lens.
Once your subject has come into focus, you should hear a beep. That means that you’re focused and ready to take the shot. And again like I said before, taking that photo is easy, all you need to do is a full press and there you go, you’ve just taken your very first photo.
Now moving backwards slightly we have a dial. You can dial this right or left and you’ll use this quite a lot to quickly change your settings. With this dial, depending on what mode you're in, you can change settings such as your shutter speed, your aperture and even your ISO.
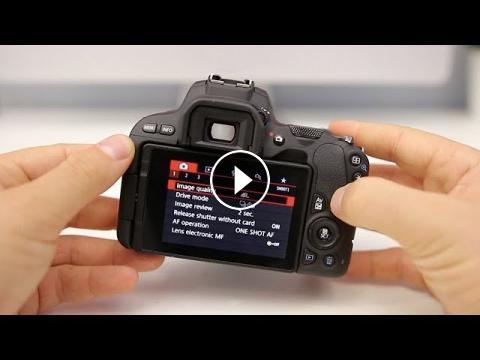
Speaking of ISO, moving back we have two buttons which you can use to your liking. On the left is your ISO button which will allow you to quickly change this and on the right is your display button. Moving down to the top left, we’ve got a button you’ll use a lot, and that’s the menu button.
Whenever you press this button, you’ll be taken into a mode where you can change all of your different settings of the camera.
This is great and is one of the reasons why I love shooting on Canon SL2 as it really allows you to have full control of your camera. You can move through the menus either by using the touch screen on the back of the camera, or by using the main dial or touch pad on the right here.
Now next to the menu button is a button that I love to use which is the info button.
It’s great to use especially if you’re using the live view monitor as it allows you to customise exactly what you see on your screen.
There might be some times when you really want to see all of the settings that your currently using, or times when you want to have a completely bare screen so you can really focus on your subject and your composition. You can even add a histogram or level on the screen to really make sure you’re getting your shot right in the camera. To change whats displayed, it really is pretty simple though, all you need to do is hit that info button until you’re happy with whats being displayed.
Moving right again you’re going to see your viewfinder which is something that you’ll use a lot.
Now even though your Canon SL2 does have a pretty nice LCD on the back of it, it’s a good idea to still use your viewfinder when taking shots.
Theres a couple of reasons for this. Firstly, autofocus is generally a lot quicker when using it. It also gives you another point of contact and stability which means it can help you get sharper shots with less camera shake.
And one other reason is that in bright conditions, it can be a lot easier to see. Whereas with an LCD screen you can often have trouble viewing it with glare, having a closed off viewfinder really allows you to make sure you’re getting the best shot possible.
If you normally wear glasses or have trouble seeing, you might want to use the diopter scroll wheel which is located right next to it.
You can adjust this to your liking. Moving to the right again we’ve got a button that I love to use as a filmmaker and that’s the record button. We can see this as it’s got a red recording dot to highlight this.
When you’re in video mode, to start a video recording, all you need to do is hit the red button and you’re good to go. You’ll be able to see that your recording as well by checking the rear LCD screen which will say it’s recording as well.
But what if you hit this button in stills mode? Well that’s a good question and what it does is bring up live view mode for taking photos.
So if you don’t want to shoot with the viewfinder any reason, you can simply press the live view button and you’ll see the LCD come to life.
If you want to turn it off, again all you need to do is hit it again and you’ll see that we’ve got our regular stills screen.
✅✅ Canon SL2:
✅✅ Canon 200D:
Canon SL2 Tutorial For Beginners - Canon 200D User Manual Guide Tutorial
So now we’ve learnt the very basics of getting your Canon SL2 set up, let’s now take a look at some of the physical features.So to turn your camera on, its as simple as you’d expect. All you need to do is flick the with on the top here to the on side. You should hear the camera turning on and the rear LCD will also come on.
Tour of the buttons on the Canon 200D.
Let’s now take a look at some of the buttons that you’ll find on your Canon SL2. Starting at the very front of the camera, we have probably what is the most important button and that’s the shutter button, or the button that you’ll use to physically take a photo.
This button here has two ways to use it, you can press it fully down or you can half press it, which will allow you to focus.
Let’s try this out. So like I said before, one you’re looking through your viewfinder, you can frame up your subject and if it’s not in focus, lightly press down on the shutter button.
From here you’ll probably hear your camera autofocusing or more specifically your lens.
Once your subject has come into focus, you should hear a beep. That means that you’re focused and ready to take the shot. And again like I said before, taking that photo is easy, all you need to do is a full press and there you go, you’ve just taken your very first photo.
Now moving backwards slightly we have a dial. You can dial this right or left and you’ll use this quite a lot to quickly change your settings. With this dial, depending on what mode you're in, you can change settings such as your shutter speed, your aperture and even your ISO.
Speaking of ISO, moving back we have two buttons which you can use to your liking. On the left is your ISO button which will allow you to quickly change this and on the right is your display button. Moving down to the top left, we’ve got a button you’ll use a lot, and that’s the menu button.
Whenever you press this button, you’ll be taken into a mode where you can change all of your different settings of the camera.
This is great and is one of the reasons why I love shooting on Canon SL2 as it really allows you to have full control of your camera. You can move through the menus either by using the touch screen on the back of the camera, or by using the main dial or touch pad on the right here.
Now next to the menu button is a button that I love to use which is the info button.
It’s great to use especially if you’re using the live view monitor as it allows you to customise exactly what you see on your screen.
There might be some times when you really want to see all of the settings that your currently using, or times when you want to have a completely bare screen so you can really focus on your subject and your composition. You can even add a histogram or level on the screen to really make sure you’re getting your shot right in the camera. To change whats displayed, it really is pretty simple though, all you need to do is hit that info button until you’re happy with whats being displayed.
Moving right again you’re going to see your viewfinder which is something that you’ll use a lot.
Now even though your Canon SL2 does have a pretty nice LCD on the back of it, it’s a good idea to still use your viewfinder when taking shots.
Theres a couple of reasons for this. Firstly, autofocus is generally a lot quicker when using it. It also gives you another point of contact and stability which means it can help you get sharper shots with less camera shake.
And one other reason is that in bright conditions, it can be a lot easier to see. Whereas with an LCD screen you can often have trouble viewing it with glare, having a closed off viewfinder really allows you to make sure you’re getting the best shot possible.
If you normally wear glasses or have trouble seeing, you might want to use the diopter scroll wheel which is located right next to it.
You can adjust this to your liking. Moving to the right again we’ve got a button that I love to use as a filmmaker and that’s the record button. We can see this as it’s got a red recording dot to highlight this.
When you’re in video mode, to start a video recording, all you need to do is hit the red button and you’re good to go. You’ll be able to see that your recording as well by checking the rear LCD screen which will say it’s recording as well.
But what if you hit this button in stills mode? Well that’s a good question and what it does is bring up live view mode for taking photos.
So if you don’t want to shoot with the viewfinder any reason, you can simply press the live view button and you’ll see the LCD come to life.
If you want to turn it off, again all you need to do is hit it again and you’ll see that we’ve got our regular stills screen.
- Category
- Photography
Sign in or sign up to post comments.
Be the first to comment
Up Next
-
05:41

Watch This Before You Buy A Canon SL2/200D!!
-
03:30
Canon SL2 (200D) Tutorial - Mode Dial Settings Guide
-
18:42
Is The CANON SL2 (200D) Worth Owning In Mid 2019?!
-
09:44
7 Gmail Settings Every User Should Know! (2019 Tutorial)
-
18:24
Canon M50 vs Canon SL2 (200D) - Which is the BEST beginner camera 2019?
-
01:58
Canon SL2 (200D) Tutorial: How To Set Up Back Button Autofocus
-
03:46
Canon T7i (800D) Tutorial For Beginners - Users Guide Manual
-
03:24
Canon SL2 (200D) Tutorial - How To Set Up WiFi
-
04:01
Canon 77D Tutorial For Beginners - Users Guide Manual
-
05:40
Canon SL2 (200D) vs 80D - Which Canon DSLR should you buy?
-
05:21
Canon 77D Tutorial - Best Settings For High Quality DSLR Video!
-
09:26
Canon SL2/200D Review - The Best Beginner DSLR For 2018!
-
04:41
Canon 77D Tutorial - Beginner’s User Guide to the Buttons, Dials & Settings
-
03:11
Canon SL2 (200D) Tutorial - How to connect DSLR to your computer via Wifi and control it (tether)
-
05:05
Canon T7i (800D) Tutorial - Beginner’s User Guide to the Buttons, Dials & Settings
-
08:08
7 Zoom Settings Every User Should Know! (2020 Tutorial)
-
04:37
Canon SL2 (200D) vs Canon SL1 (100D) - What is the Best Canon Beginner DSLR?
-
08:31
Canon SL2 (200D) vs Nikon D5600 - Best Beginner DSLR 2018!
-
12:47
Canon SL2 (200D) Tutorial - Best Settings For High Quality Video
-
08:46
Best Cheap Lenses For The Canon SL2 (200D)
-
04:08
Canon SL2 (200D) Unboxing & Review of what you get in the box
-
02:08
Beginner's guide to Canon wireless flash